
We publish this blog to advise our customers on best practices for installing Revit and Revit updates as per our personal experience.
Make sure your computer hardware meets the minimum specifications for the purpose of installing Revit/Revit LT.
Make sure that you have the relevant administrative permission to install your software on your computer and contact your Information Technology Department to assist you if you are unsure if you have this status.
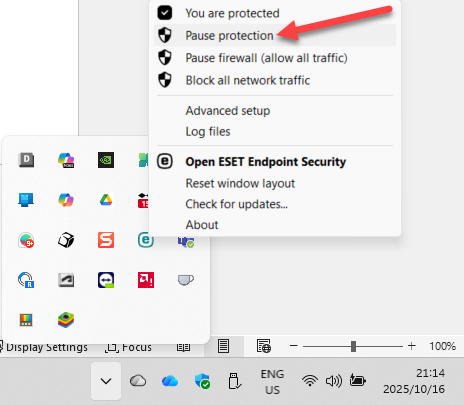
Disable your virus protection temporarily while you install and activate. The process of doing this depends on the virus protection software you are running and might involve your Information Technology Department depending on how your computer is managed.
Set the windows User Account Control setting to a minimum temporarily. If you are unsure where to find the User Account Control dialogue, search in Windows.

Use the slider to select the lowest possible level.

I prefer not using Autodesk Access for updates or installations (web installers). We have encountered unexpected exceptions that had a range of impacts on the computers they were installed on and may incur a substantial cost if they are encountered. These exceptions are usually encountered when an installation or update for Revit is interrupted. Often these interruptions are linked to power cuts, internet interruptions or impatience on the part of the person who is doing the installation. Instead, download the updates and installations directly from your account and then run them as Administrator directly from your hardware.
To get to your account, open Autodesk Access. Click on the hyperlinked “View all your products and services” text at the top of Autodesk Access.

Once you’re in your account, navigate to the All Products and Services tab Filter the results for “Revit” and click on the hyperlinked “View details” text at the base of the Revit panel.

On the details page, choose the version of Revit you would like to install and then use the drop down to select the “Direct Download” option.

This downloads two files (allow this on your browser if required).

One is a .7z file (compressed file). The other is a .exe file (executable).

The fact that there are just two files makes it fast to copy onto external media and onto other computers (fewer files copy faster than many files). Also, once the two files are downloaded, you are pretty much certain to have all the required files to install intact and on your hard drive. Power cuts and internet problems will not interfere with your installations.
Right Mouse Click (RMC) on the .exe and choose to install as Administrator. For Revit, this extracts the installation files to C:\Autodesk\WI\RVT_2026_NA_win_db_002_002\image\.

Do not “Run Installer” after it is extracted. Instead, “Open in folder”.

Right mouse clock on Setup.exe and “Run as administrator”.

If the installation gets stuck, do not cancel. Wait at least 30 minutes before pressing Cancel. You stand a good chance that the installation will complete if you just wait.

If you do press Cancel you may find that the uninstall process gets stuck at 3%. In this case you will need to close the application in Windows Task Manager with an RMC and End task. At this point you should contact Micrographics so we may assist you further.
If you were to troubleshoot on your own, it might come to a clean uninstall and reinstall of Revit (here are some extra entries in the registry to get rid of), and failing that, a clean uninstall and reinstall of all Autodesk software. It also pays to Check if Autodesk Install Process are not Blocked in the Registry. In a few cases, we must resort to either getting Autodesk specialists involved directly, or to reset the computer when everything else failed to resolve the issue (a last resort). If you contact Autodesk directly, remember that, so long as you are a Micrographics customer, you are most welcome to copy us in on the conversation.
As a matter of interest, I like to reset my computer once a year in any case. I generally wait until the December holidays, running an app to tell me all the software that is installed on my machine (then I know what software to reinstall). I then schedule times with my IT to hook me up to my corporate identity, and then go ahead, reset windows and format my hard drive. What also allows me to do this is that I manage my files such that they are all backed up on the cloud. Here, there are also various strategies you can follow.
For the Autodesk construction cloud, I use a large hard drive, synch the entire project onto my hard-drive and then use ROBOCOPY to copy all the synced files onto external media. AWS servers are very secure, and when there is an outage, they generally come back online quickly.
We recommend you follow the same process for any installations and updates for other Revit versions.

