
Introduction: Every Successful Project Starts Before the First Wall
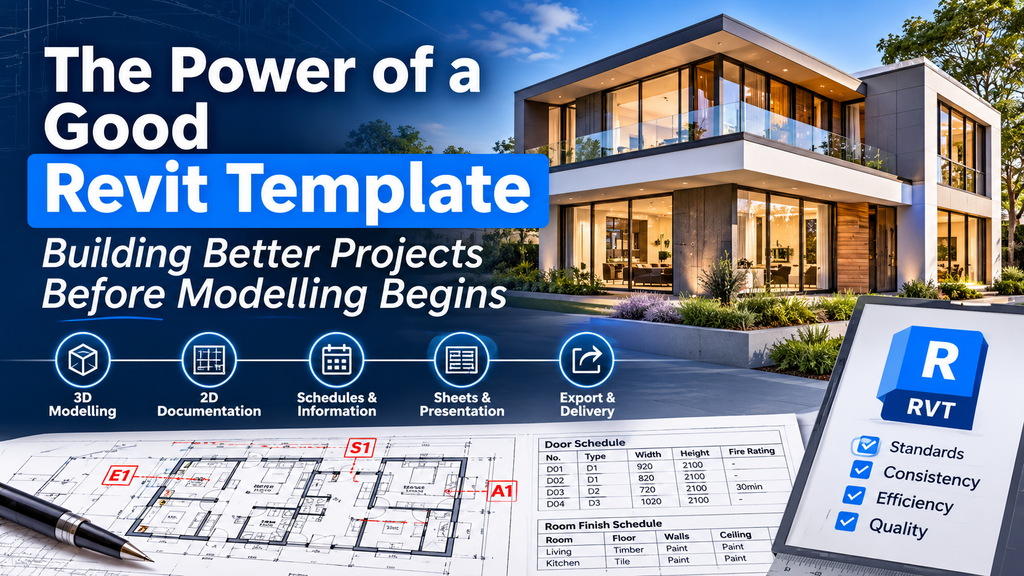
When starting a new project in Autodesk Revit, most users are eager to begin modelling. Walls, floors, roofs, doors, windows and other building elements are usually the first things that come to mind. However, before the first wall is placed or the first level is created, there is an important decision that can have a significant impact on the entire project: the choice of project template.
A well-developed Revit template is much more than a collection of predefined settings and loaded families. It establishes the working environment, documentation standards, information requirements and presentation methods that will be used throughout a project.
Many organisations invest considerable time developing their 3D modelling standards but overlook the importance of standardising the documentation produced from those models. Yet, drawings, schedules, details and exported PDFs are ultimately what communicate design intent to clients, consultants and contractors.
This is where a properly structured Revit template becomes particularly valuable. It provides a consistent foundation before modelling begins, helping teams work more efficiently, produce consistent documentation and maintain company standards across multiple projects.
In this blog, we will explore the development of an Architectural Residential Template and examine how a well-planned template can support everything from 3D modelling to the final delivery of construction documentation.
1. Understanding the Purpose of a Revit Template
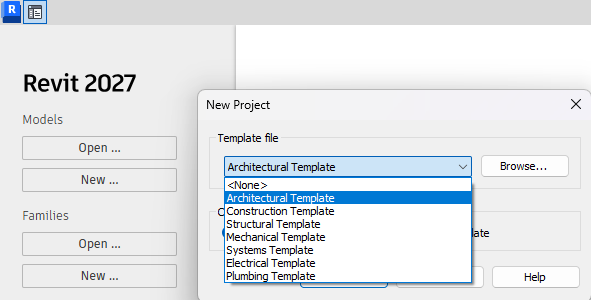
A Revit project template is a starting point for new projects. Saved with the .RTE file extension, it contains predefined project settings, views, families, schedules, sheets and other resources that establish the initial project environment.
Rather than configuring the same settings every time a new project begins, companies can prepare these elements in advance and make them available to everyone working within the organisation.
For an architectural practice specialising in residential buildings, for example, a template could include standard wall and floor types, commonly used door and window families, predefined annotation styles, schedules, drawing sheets and company-specific title blocks.
The objective is not to include absolutely everything that Revit offers. Instead, the template should contain the resources and settings that are genuinely useful for the company’s typical projects.
It is also important to distinguish between a template and a project file. A template establishes the starting environment, while the actual project contains the building design, project-specific information and developed documentation.
A good template should therefore provide a structured foundation without restricting the flexibility required for individual projects.
2. Establishing the 3D Modelling Environment
The 3D modelling environment is usually the area that receives the most attention when companies develop their Revit templates. This is understandable, as the building model is central to the BIM process.
However, the objective should be to establish consistency rather than simply load as many families as possible.
For an Architectural Residential Template, useful predefined elements could include:
- Standard wall types for external and internal construction.
- Floor and roof types with appropriate layer structures.
- Ceiling types and common construction assemblies.
- Door and window families with standardised parameters.
- Staircases, railings and other commonly used architectural components.
- Materials, surface patterns and predefined graphic settings.
- Standardised levels, grids and project units where appropriate.
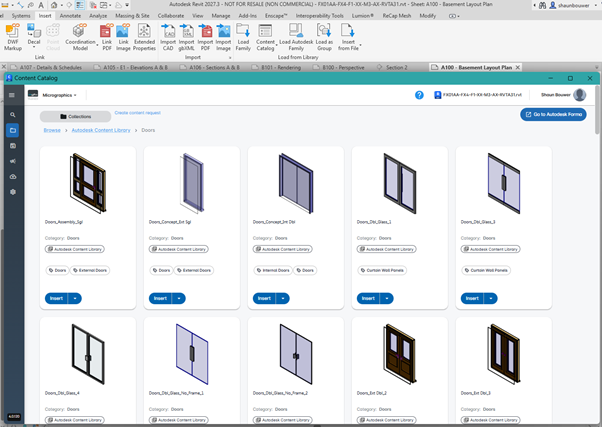
System families such as walls, floors, roofs and ceilings can be configured directly within the project template. Component families, such as doors, windows and furniture, can be loaded and made available for use when creating a new project. The Autodesk Content Catalog within Revit (Insert Tab > Load From Library Panel) can help speed up your company’s workflow, keeping the families easily accessible, yet externally saved (cloud-based), keeping the template clean and reduced in size. External Reference link: Content Catalog Help | Autodesk

It is equally important to establish naming conventions. A wall type named EXT – 280mm Brick Wall is considerably easier to understand.
Consistent naming makes it easier for users to identify the correct construction type, manage project information and maintain standards as the project develops.
The template should also be reviewed regularly to remove unnecessary content (Purge Unused).
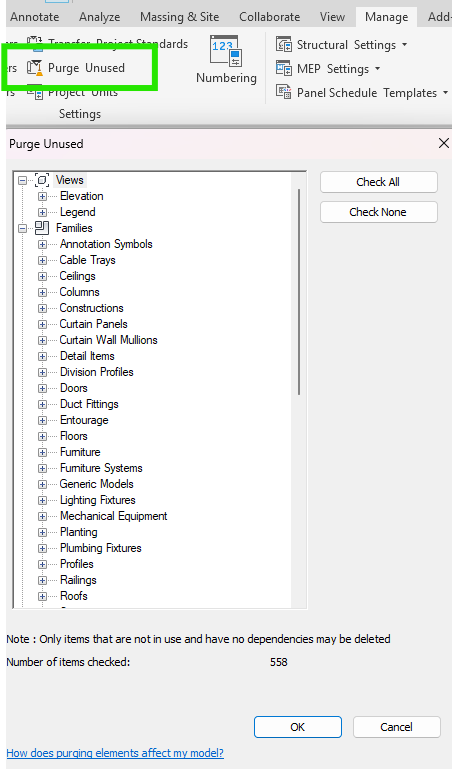
Loading hundreds of families that are rarely used can increase the complexity of the project and make it more difficult for users to find the elements they need.
The goal is a practical, organised modelling environment that supports the company’s everyday work.
3. Beyond 3D: Building a Consistent 2D Documentation Environment
One of the most important aspects of a Revit template is the documentation environment.
A common misconception is that templates are primarily intended to standardise 3D views and preloaded families. While these are important, most of the construction documentation is ultimately communicated through 2D drawings (Views – Floor Plans, Elevations, Sections, etc.), schedules, details and sheets.
A residential building may have an excellent 3D model, but if its floor plans, elevations, sections and construction details are presented inconsistently, the quality of the final documentation suffers.
A properly developed template should therefore include a comprehensive collection of predefined 2D documentation resources.
Views and View Templates
Companies can prepare standard floor plan views, reflected ceiling plans, elevations, sections and other commonly used views. These can be configured with appropriate scales, detail levels, visibility settings and graphic presentation (Elevation and Section Markers, and other tag or system marker elements).
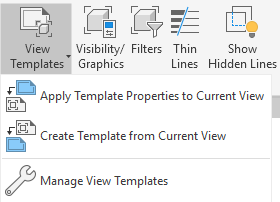
View Templates are particularly useful because they allow consistent view properties to be applied across multiple views. For example, a standard construction floor plan can use a predefined View Template that controls its scale, visibility settings, discipline and other relevant properties.
Drafting Views and Standard Details
Drafting Views provide an excellent opportunity to include standard construction details that are frequently used across residential projects.
Examples include:
- Typical wall and foundation details.
- Roof construction details.
- Window and door installation details.
- Staircase and handrail details.
- Waterproofing and damp-proofing details.
- Typical bathroom and kitchen construction details.
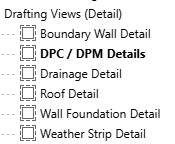
These details can be prepared in advance and included in the template, allowing users to reuse them when appropriate.
However, standard details must always be reviewed against the actual project design, applicable regulations and construction requirements. A typical detail should never be assumed to suit every situation without verification.
Text, Dimensions and Annotation Standards
Another important consideration is the visual consistency of documentation.
A company should establish standard text types, fonts, text heights, dimension styles, leader settings, line styles, line weights and other annotation properties.
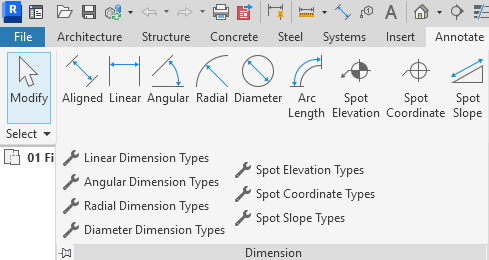
For example, if one draughtsperson uses a 2.5 mm text height for general annotations while another uses 3.5 mm, the resulting drawing package may appear inconsistent even when both users are working on the same project and the same font type.
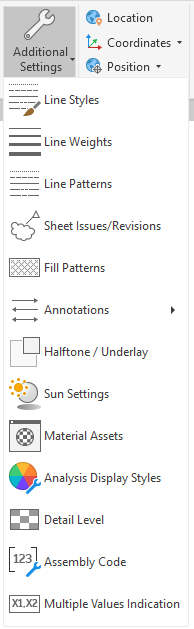
By establishing these settings within the template, the company creates a common graphical language that can be applied across its documentation.
Tags: Standardising the Way Information Is Presented
Tags deserve particular attention when developing a company template.
In Revit, tags are annotation families that identify and display information about model elements. They are not simply text labels placed over objects. They are associated with elements and can display information through parameters defined within the relevant family or project.
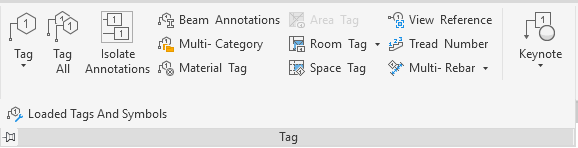
Companies can develop and load their own standardised tag families into the project template.
This can include door tags, window tags, room tags, wall tags, material tags, furniture tags, structural tags and many other annotation types, depending on the company’s requirements.
The advantage is that everyone uses the same graphical representation and information presentation.
For example, a company may establish a specific door tag containing the door number and type, displayed within a standard graphical symbol. Every project using that template can then start with the same tag family rather than relying on individual users to create their own versions or not having any tags available, slowing down production.
It is also important to consider the parameters used by these tags. If a tag relies on a particular shared parameter, that parameter must be available and correctly configured for the relevant family or project.
A standardised collection of tags helps maintain a consistent appearance throughout the drawing package and reduces the need to recreate annotation families for every new project.
Ultimately, the 2D documentation environment should be treated with the same care and attention as the 3D modelling environment.
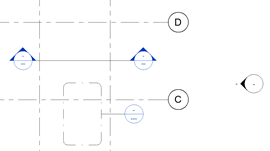
The Elevation, Section, Grid, Callout and other markers are also important to consider. These families can be altered, adjusted and reconfigured.
4. Schedules, Legends and Information Management
Revit schedules are among the most valuable tools available for extracting and presenting information from a BIM model.
However, creating and formatting schedules from scratch for every project is unnecessary when many of the requirements are repeated.
A residential architectural template could include predefined schedules such as:
- Door schedules.
- Window schedules.
- Room schedules.
- Room finish schedules.
- Furniture schedules.
- Material schedules.
- Area schedules.
These schedules can be configured with the required fields, sorting, grouping, formatting, headers, text styles and column widths.
For example, a door schedule could already contain fields for door number, door type, width, height, fire rating and other relevant information. As doors are placed and correctly configured in the project, the schedule can populate automatically.
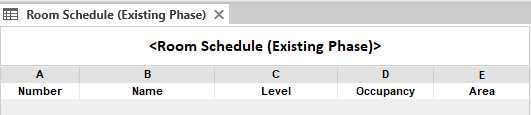
Room schedules can similarly be prepared to report room names, numbers, areas and other required information.
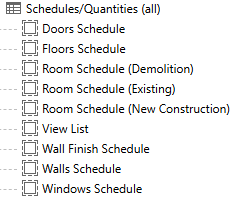
An important consideration is that schedules depend on the parameters available within the relevant model categories and families. If a company requires a particular parameter to appear in a schedule, that information must be established as part of the template and family development process.
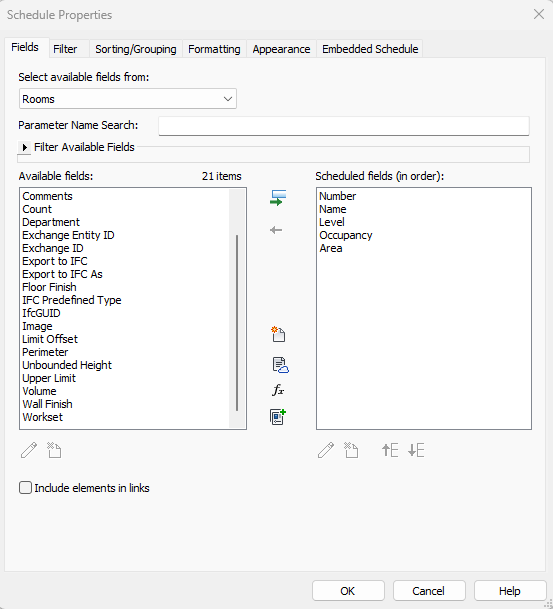
Shared parameters can be particularly useful when the same information needs to be consistently reported across different family categories or documentation workflows.
Legends are another useful resource that can be prepared in advance.
Companies can include standard legends for doors, windows, materials, line types, symbols and other graphical conventions. These can be placed on sheets without having to recreate the same explanatory information for every project.
By including schedules and legends in the template, companies establish not only how their models are presented but also how information is extracted, organised and communicated.
This is an important distinction: BIM is not simply about creating geometry. It is also about creating structured, accessible and useful information.
5. Sheets, Title Blocks and Drawing Presentation
The next step is to consider how the information will be presented.
In most architectural practices, the final deliverable consists of a coordinated drawing package containing plans, elevations, sections, details, schedules and other project information.
The template should establish how these deliverables are organised.
Company-standard title blocks can be loaded into the template, including the required project information, drawing identification, revision information, company branding and other relevant details.
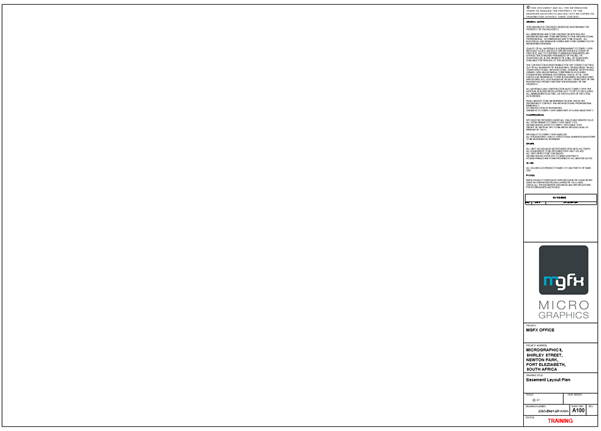
Different sheet sizes, such as A1, A2 and A3, can be made available depending on the company’s documentation requirements.
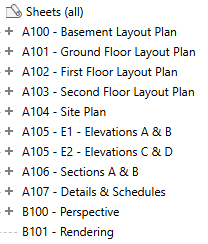
Companies can also prepare standard sheet layouts containing predefined schedules, legends, notes and other recurring information.
For example, a residential drawing package may follow a consistent structure:
- General information and drawing index.
- Site plan and setting-out information.
- Floor plans.
- Roof plan.
- Elevations.
- Sections.
- Construction details.
- Door and window schedules.
- Room finish schedules.
This does not mean every project must follow exactly the same drawing sequence. Instead, it provides an established starting point that can be adapted when necessary.
The benefit is that users spend less time preparing the presentation environment and more time developing and coordinating the actual design.
Most importantly, the resulting drawing package maintains a consistent company appearance, regardless of which team member prepared the individual views.
6. Export and Delivery: From Revit to PDF and DWG
A Revit project does not exist in isolation. Its information is frequently shared with other consultants, contractors, clients and external project stakeholders.
For this reason, export and delivery settings should also form part of the template development process.
PDF documents are among the most common ways of distributing architectural construction documentation. Companies should establish consistent PDF output settings, including the required sheet selection, paper sizes, orientation, output quality and file organisation.
DWG exports are equally important when exchanging information with consultants and other professionals working in AutoCAD.
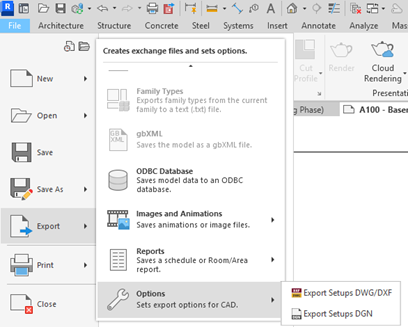
Revit allows users to configure DWG export settings, including layer mapping, line handling, colours, units and other translation options. These configurations can be saved within the project and carried into a template for reuse.

For example, an architectural practice may have a standard layer mapping convention that ensures walls, doors, windows, dimensions and other drawing elements are exported to the correct CAD layers.
Without predefined settings, individual users may select different export configurations, resulting in inconsistent DWG files that require additional preparation before they can be used by other project participants.
It is worth remembering that not every delivery requirement is controlled by the Revit template. Some publishing, naming, approval and document-management procedures may need to be established separately within the organisation’s wider project delivery workflow.
Nevertheless, preparing the appropriate export configurations in advance is another practical way of improving consistency and reducing repetitive work.
The objective is simple: the information leaving Revit should be just as well organised as the information inside the project.
7. Standardisation vs Flexibility: Why Different Projects Need Different Templates
One of the biggest mistakes an organisation can make is attempting to create one enormous template that accommodates every possible project type and discipline.
An architectural residential project has very different requirements from a commercial office development, a hospital, an industrial facility or a structural engineering project.
Although some standards and settings may be shared, each discipline and project type has its own documentation requirements, families, schedules, parameters and workflows.
For this reason, companies should consider developing separate templates where appropriate.
For example:
- Architectural Residential Template.
- Architectural Commercial Template.
- Structural Engineering Template.
- Mechanical, Electrical and Plumbing Template.
The exact structure will depend on the organisation and the type of work it undertakes.
A residential template may contain typical house construction details, room finish schedules, residential door and window schedules and standard residential sheet layouts.
A commercial architectural template may require different schedules, additional documentation views, more extensive material information and different sheet structures.
The important thing is to avoid unnecessary complexity.
A template should provide the resources users need without restricting their ability to adapt the project when required.
Standardisation should make work easier, not introduce additional administrative overhead.
8. Collaboration, Maintenance and Template Governance
A good Revit template should not be considered a once-off development exercise.
As companies gain experience, develop new standards and encounter different project requirements, their templates should evolve accordingly.
This requires someone to take ownership of the template and manage its development.
Organisations should establish a review process to ensure that loaded families, schedules, tags, view templates and other settings remain relevant and accurate.
It is also important to test template changes before distributing them to the wider team.
When working in a collaborative environment, consistent project setup can help establish common naming conventions, view organisation and documentation practices across team members.
However, it is important to understand that a template does not automatically configure every aspect of collaboration.
Worksharing, worksets, cloud collaboration, permissions, linked models and project-specific coordinates still require appropriate project setup.
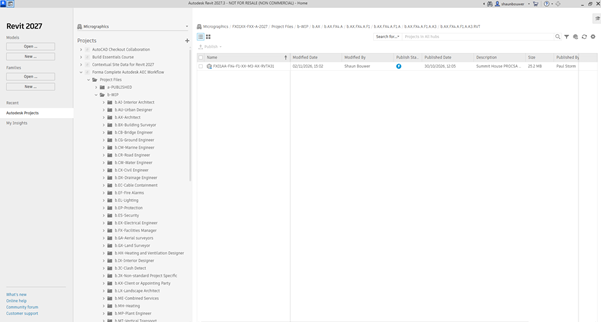
The template establishes the foundation, while the project team remains responsible for configuring and managing the actual working environment.
A controlled template development process helps ensure that improvements are introduced consistently rather than allowing individual users to develop their own variations of company standards.
9. Practical Template Audit: Is Your Template Ready?
Before distributing a new template, it is worth creating a test project to evaluate how well it supports the intended workflow.
Consider the following questions:
- Are the required wall, floor, roof and component families available?
- Are views and View Templates organised consistently?
- Are text styles, dimensions, annotation and tags standardised?
- Are Drafting Views and typical construction details available?
- Do schedules contain the correct fields and formatting?
- Are legends and title blocks ready for use?
- Can users create a complete drawing package using the predefined sheets?
- Are PDF and DWG export settings configured correctly?
- Is unnecessary content removed?
- Have the template’s standards and parameters been tested?
A template should be judged by how effectively it supports an actual project, not simply by how many settings and families it contains.
Test your Template using the Autodesk Model Health Checker. External Help Page: Interoperability Tools

Autodesk YouTube Reference Link: Autodesk Standardized Data Tool for Revit – YouTube
Conclusion
Better Projects Begin with Better Preparation
A well-developed Revit template is one of the most valuable resources an architectural practice can establish.
It provides a consistent starting point for modelling, documentation, information management and project delivery.
More importantly, it ensures that company standards extend beyond the 3D model into every aspect of the final drawing package.
By investing time in developing appropriate templates, organisations can reduce repetitive setup tasks, improve documentation consistency and provide their teams with a more structured working environment.
Ultimately, successful BIM implementation is not only about how accurately a building is modelled. It is also about how effectively the resulting information is organised, communicated and delivered.
The best time to establish these standards is before the first wall is modelled.
Final Thought
A Template Is Never Truly Finished
Even elements that seem fixed, such as elevation, section and callout markers, can be customised to match your company’s standards. You are not limited to Revit’s default blue bubbles!
And remember, a comprehensive Revit template is not built overnight. It takes years of development, and even then, still grows. A template evolves continuously as software changes, regulations are updated, and new building systems emerge. Establish a strong foundation before starting, but don’t be afraid to refine and improve it as your projects and industry evolve.
You have more control over Revit’s appearance than you might think, and your template is a living resource, not a once-off project.

