
Discover how Autodesk ReCap 2026 revolutionizes reality capture with its new Scan-to-Mesh capabilities. This update transforms laser scans into accurate, lightweight 3D models in record time, streamlining workflows for architects, engineers, and construction professionals who depend on precise as-built data.

Reality capture has always bridged the gap between the real world and the digital model. With Autodesk ReCap 2026, that bridge just became far more seamless. The newly enhanced Scan-to-Mesh capability introduces a faster, more intelligent workflow for converting point clouds into detailed, editable 3D meshes ready to integrate directly into tools like Revit, Civil 3D, and InfraWorks.

Expanded Capabilities with ReCap Pro 2026
The 2026 release of Autodesk ReCap Pro brings a major leap forward in how scan data can be processed and applied within design workflows. The new Scan-to-Mesh functionality lets users transform point clouds into organized mesh models directly on their local machines, giving them control over processing speed, segmentation, and data security.
With the upgraded Mesh Editor, users can isolate, classify, and group mesh surfaces into customized layers, making it easier to clean and refine complex models before sharing them downstream. Once ready, these optimized meshes can be exported in a range of formats, including Revit-compatible models for building design integration.
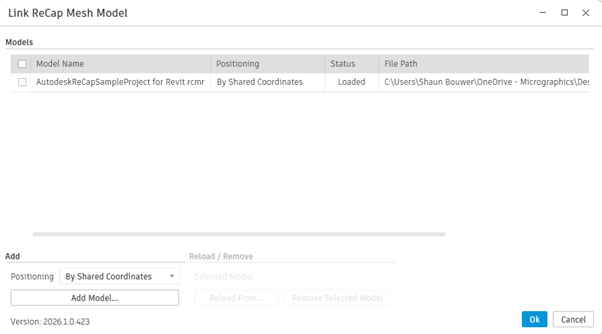
In Revit, a new plugin enhances this connection even further. Linked mesh models offer noticeably better performance compared to traditional point clouds. Designers can import the mesh geometry directly into projects or convert selected segments into editable Revit Families through Promote to Family. From there, users can enrich these elements by adding connectors, geometry, and parameters.
Because ReCap files now integrate seamlessly with Autodesk Construction Cloud (ACC), teams can also take advantage of improved clash detection workflows. NWC exports are automatically recognized as assets within ACC, allowing project teams to identify and resolve conflicts between captured site data and digital design models more efficiently.
New Capabilities and Workflows
The 2026 release streamlines collaboration across disciplines by enabling teams to:
- Generate meshes directly from registered scans within ReCap.
- Export optimized mesh files for use in Revit or other Autodesk tools.
- Take advantage of enhanced texture mapping and surface detail for visualization or coordination.
- Maintain higher accuracy at scale, ensuring even complex infrastructure or renovation projects align perfectly with as-built conditions.
Practical Applications
Scan-to-Mesh 2026 shines in scenarios where precision meets performance:
- Renovation and retrofit projects that rely on as-built geometry.
- Heritage documentation where surface fidelity is critical.
- Topographic modelling for site design and civil planning.
- Facility management workflows that connect existing conditions to BIM.
By automating much of the manual surface processing, ReCap 2026 empowers design professionals to focus on analysis and design decisions rather than data cleanup.
Workflow example:
- Open ReCap Pro: Start a new project and set project units/coordinate preferences.
- Import scans: Bring in your point cloud files (e.g., E57, LAS, RCP/RCS or other scan formats).
- Register / align scans: If scans aren’t pre-registered, use ReCap’s registration tools to align them into a single, accurate point cloud.
- Clean and crop: Remove stray points, noise and unneeded areas; crop the scene to the region you need to mesh.
- Set mesh generation parameters: Choose resolution/detail level, target triangle count, and any smoothing/decimation settings (higher detail = larger file).

- Generate mesh: Submit Scan-to-Mesh to convert the point cloud into a textured or non-textured 3D mesh.

- Inspect and refine: Open in Editor to visually check the mesh for holes, artifacts or geometry problems; use smoothing, hole-fill or local re-meshing if needed.

- Optimize the mesh: Decimate triangles, simplify geometry, and bake or improve textures so the file is lightweight and usable in downstream apps.
- Set origin & coordinate transform: Make sure the mesh uses the correct project origin and coordinate system before export.
- Export: Save the mesh in the target format, depending on where it will be used.


- Import into CAD/BIM: Bring the exported mesh into Revit, Civil 3D, InfraWorks or other tools for modelling, clash checking, visualization or as-built documentation.


- Document & archive: Record metadata (scan date, accuracy, settings) and store the original scans plus the exported mesh for future reference.


