
In this blog, we discuss the effect of publishing sheets in a Revit model and how they are exposed when sharing the Published Revit file in Forma Collaborate Timeliner.
For the sake of those that are new to the process, we explain the mechanism from beginning to end.
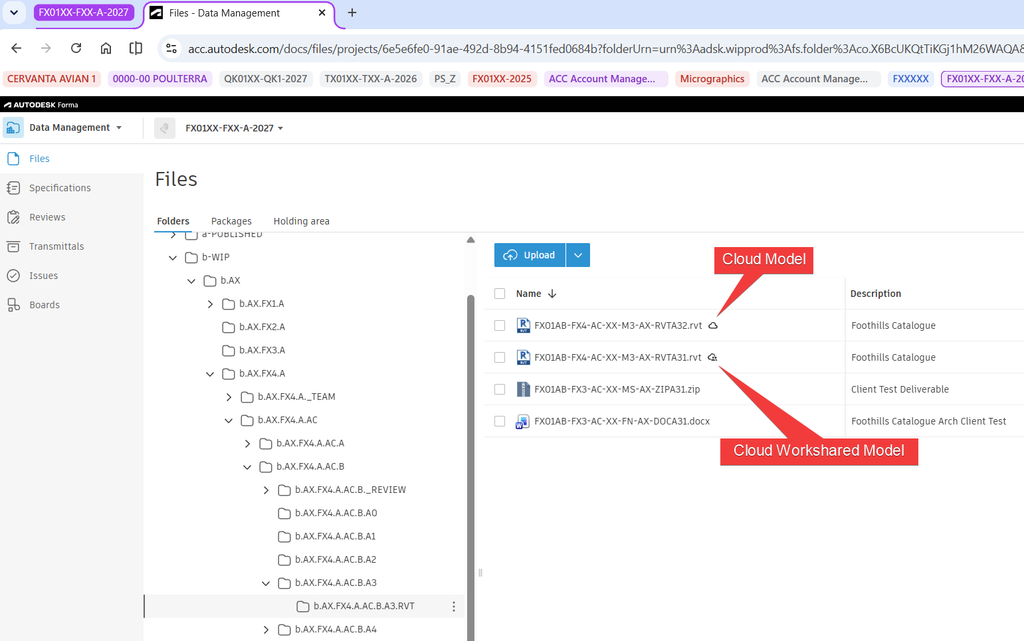
In this Forma Design Collaborate project, we have a Revit Cloud Worksharing file. This is the equivalent of a Central file on a Local Area Network (LAN). I could just as well have been a Revit Cloud file (non-Workshared) created in Revit or Revit LT. The cloud worksharing model as a little cloud with people next to it, and the cloud file has Zero person icons.
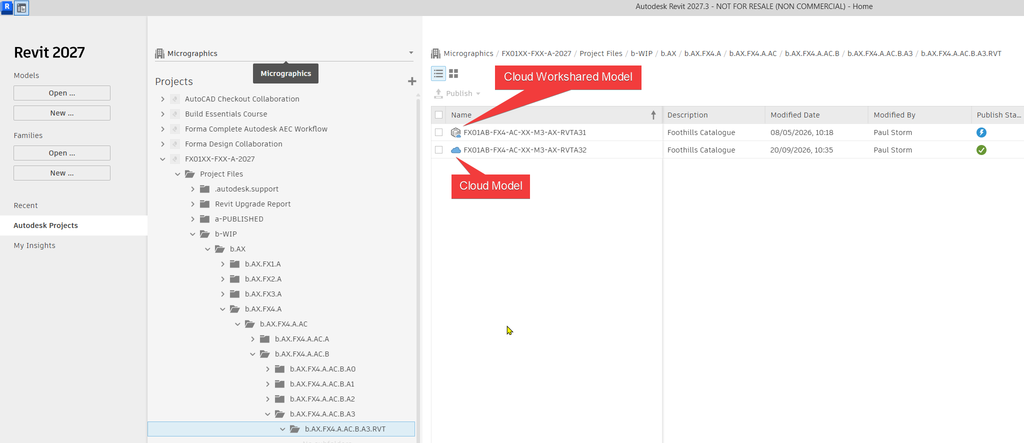
In the Revit home panel, the icons for the Cloud and Cloud Workshared model are different to what it is on the web. The Cloud Workshared model is a little box with a cloud, and the Cloud model has a larger cloud.
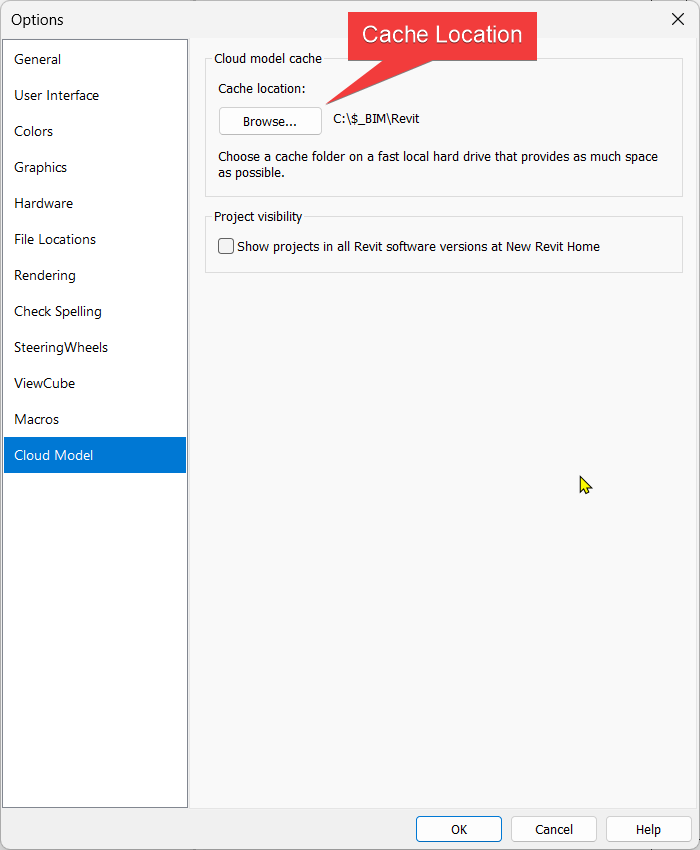
The Cloud files (Worksharing or not) are disconnected data sets. In this sense the Cloud Workshared Models are no different from Central Models hosted on a LAN. They are a local cache in which the operator models until the operator synchronizes (in the case of Cloud Workshared models) or saves (in the case of Cloud Models). You can set the folder in which Revit stores the local cache files in the options under the Cloud Model tab. This makes it easier to find. The default location is in: C:\Users\User\AppData\Local\Autodesk\Revit\Autodesk Revit 2027\CollaborationCache.
How they are different, is that the Cloud Workshared Model is an invisible file.
Many people make the mistake of thinking that the file that is visible on the Web is the “Central” Model with which one synchronises. This is usually the result of the model automatically publishing itself when you first initiate the cloud workshared model.
After initialization and during normal modelling, the “Cloud Workshared Central Model” is an invisible file (ghost file). Only those with Revit interact with it, and they never get direct access to it. They only have access to the local file. In other words, only Revit users get to see the full picture. That is, until they Publish. When a Revit user publishes the Revit model. It gets copied to the cloud and is visible to anyone with access.
Why is it done this way? Well, there are other people who have access to the model internally and who do not operate Revit. Usually these are people who can create markups and issues that they want attention paid to (managers). It would therefore make sense for the modellers only to publish once they are happy to be reviewed on the design they have come up with. This is usually asked for once a week or so.
In my opinion, it is better to publish more often (once a day) and to tell the Managers only to comment once a week. This is because the published file is the latest file on record (besides the local copies). If it is downloaded to reinitiate the file, and if it is outdated, all the changes since it was last published would be lost.
When you are getting ready to publish, you need to say what you want to publish. Also, remember that anyone with access to the Revit Cloud or Cloud Workshared model can publish. There is no way to exclude them from being able to publish, so it is important that everyone understands the concept, or to nominate individuals to publish the model.
By “Publish the model”, we do not mean that the entire model is published. At best, Views and then also Sheets are published.
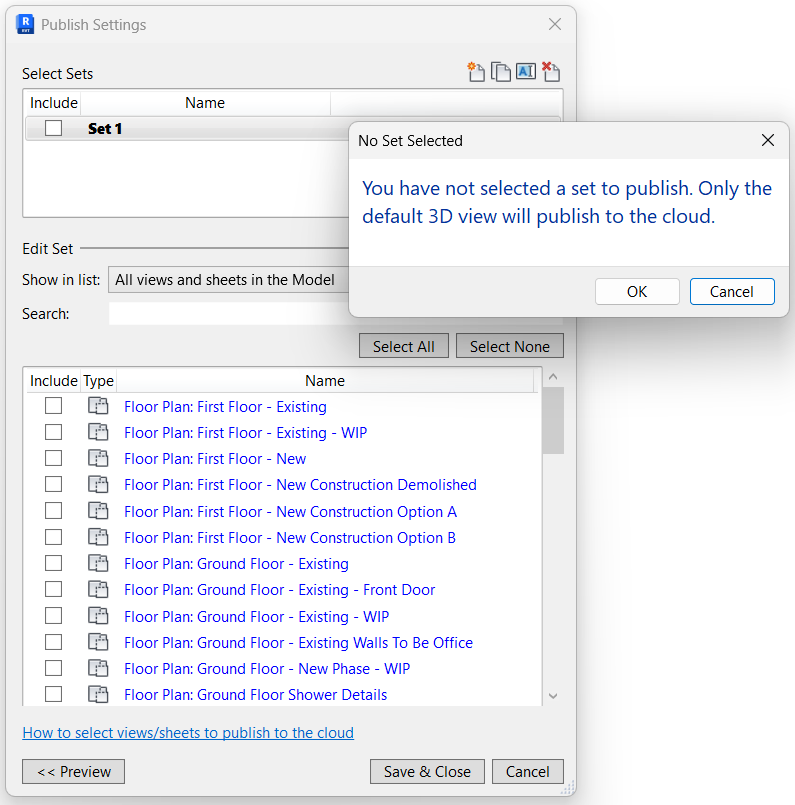
To select what is being published, open the Publish Settings. Ribbon Menu > Collaborate Tab > Manage Models Panel > Publish Settings
By default, nothing is selected, which means that only the default 3D View is published. The default 3D view is usually a work in progress, which does not make it the ideal candidate for publishing.
Instead, prepare a 3D view that is to be clash detected. Most BIM Managers will include “Navis” in the name so that it is automatically selected by Navisworks when required. You can go further and prepare multiple 3D Views to publish. Each one of these will be available for clash detection. Some BIM Managers will isolate systems for clash detection in these views (piping or ducting, for instance).
If you are familiar with creating Sheet Sets for publishing, this process is intuitive. Create a new Publish Set and then choose the views and sheets you want to include in the set for publishing. Use the filter to find the views and sheets more quickly. “Set 1” is the default set. Either delete or rename the set to suit. I rename mine to “Coordination and include the 3D Navis clash view.
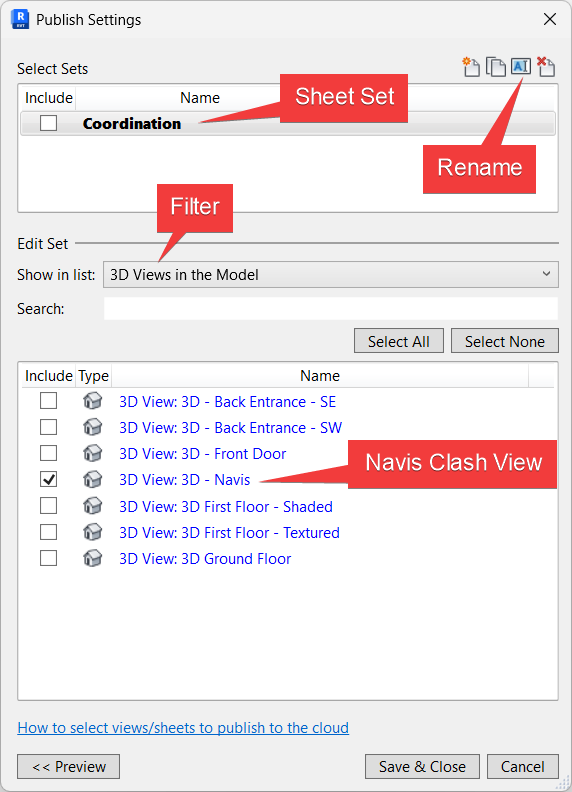
Now create a new Sheet set for the Sheets.
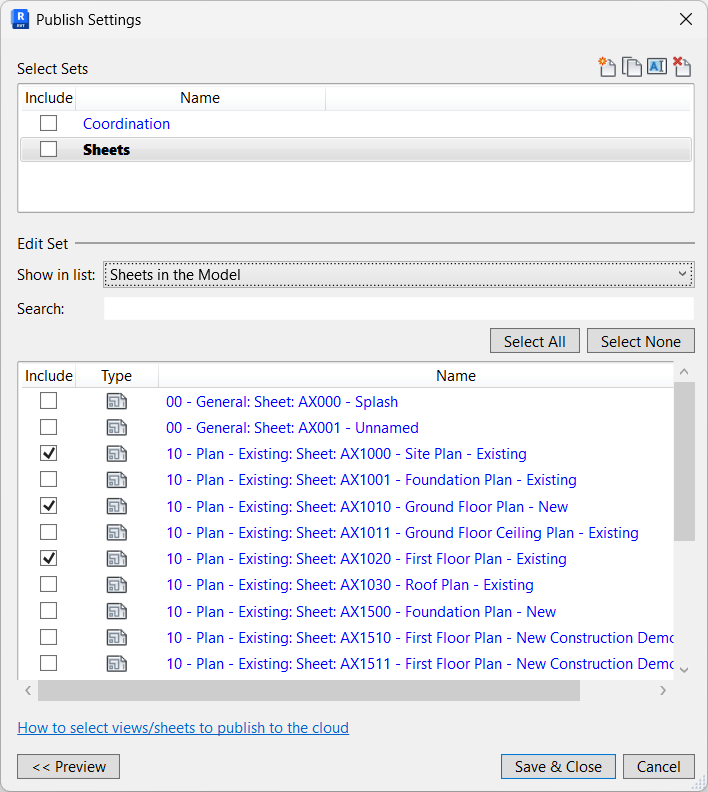
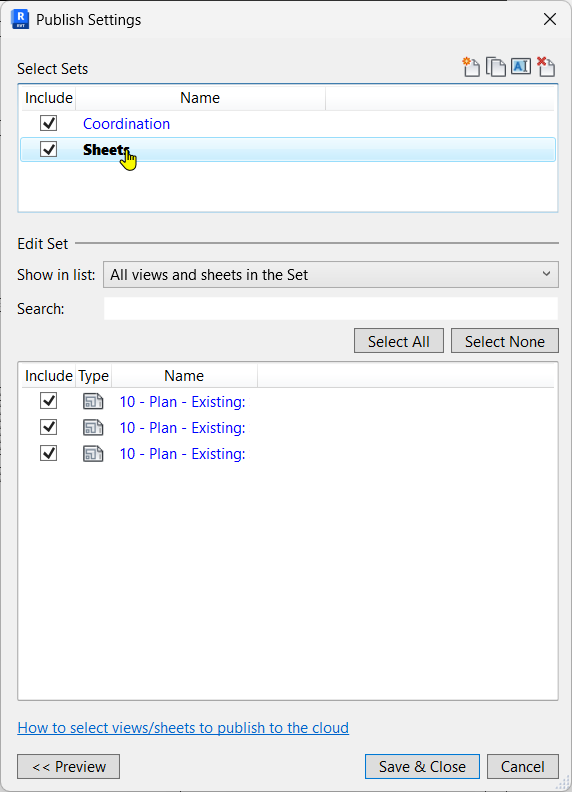
This will give you the option to publish either just the coordination view, or the sheets as well. If you filter by Sheets and Views in the set, these will display for each set as you select them.
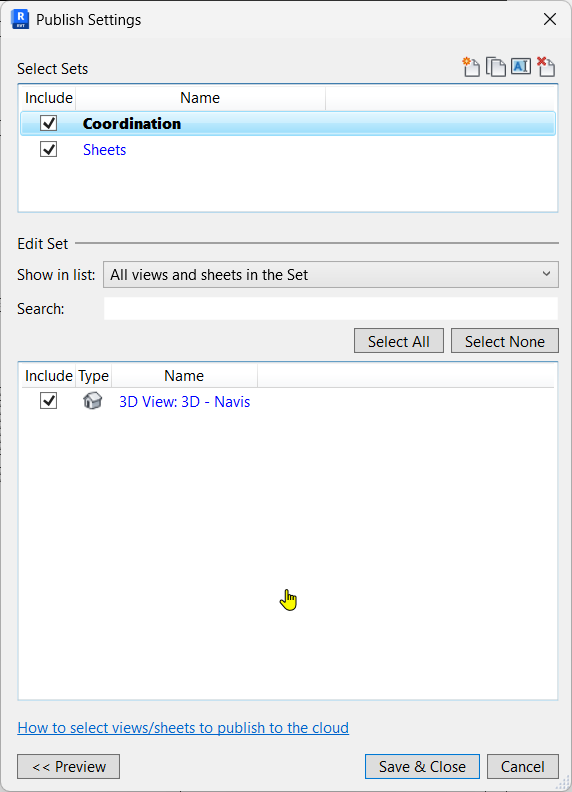
Click on the check box next to the sets if you choose to publish them.
Synchronise and save your file. You can leave it open or close it (it makes no difference). Open the home page next. It is not dynamic, so you must first refresh the page. If you made changes since the last time you synchronised.
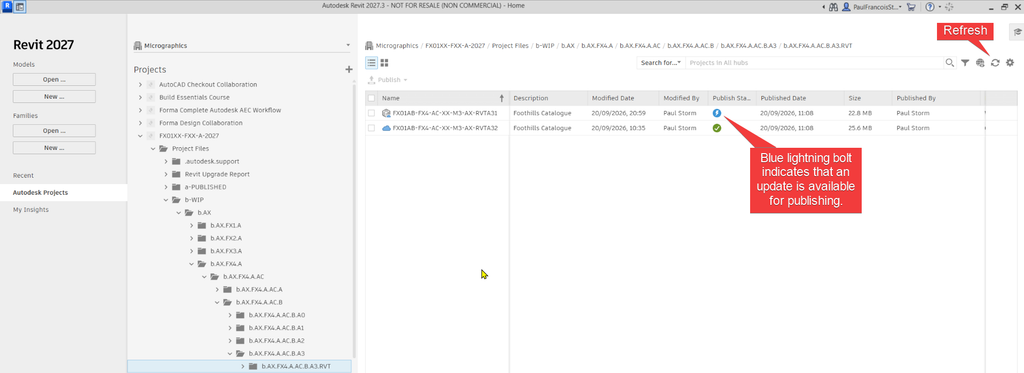
Now you can publish (or publish with links) from the Revit interface itself.
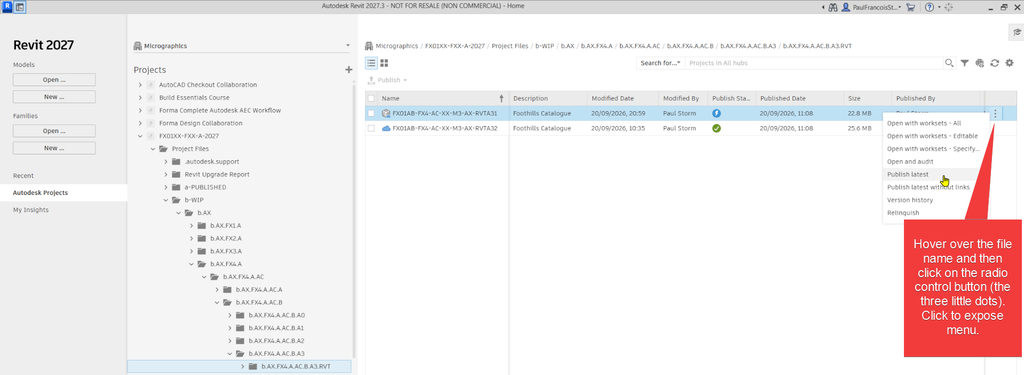
In the first publish, I am publishing both the Coordination and Sheets Publish Sets. I then share a package in Forma.
In the second publish, I am publishing only the Coordination Publish Set. I then share a package in Forma.
What I noticed is the following. Publish Sets are “remembered”, but not linked to specific versions of the models. Hence, whether you publish one or two sets are per above, both show up for inclusion in a package if they have been included before.
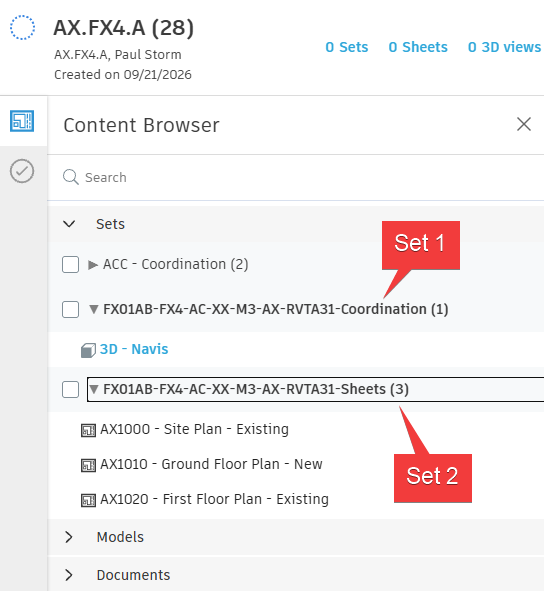
When you select one Set in the package, the model is selected for the package.
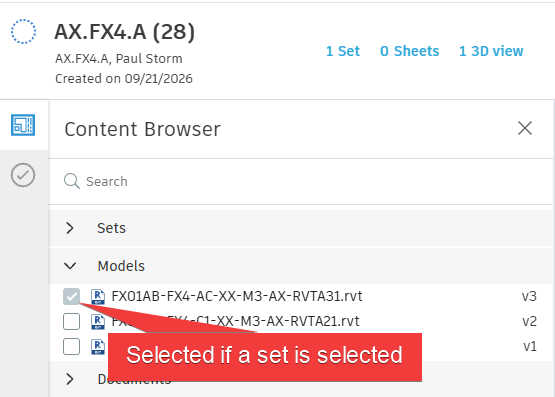
In the package definition only one set is shown as selected for the package.
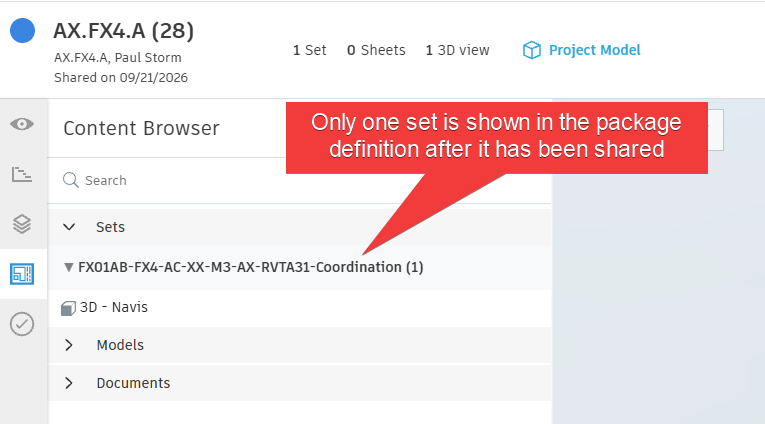
However, in the shared model, when opened in the viewer, both Sets are included.
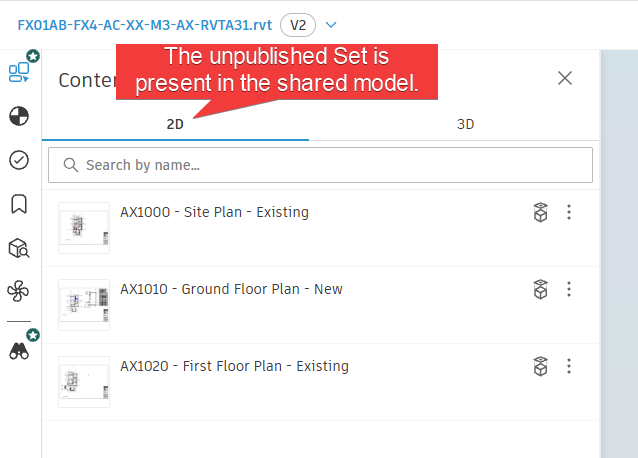
What is the conclusion I draw? It is not possible to exclude sets form the model that is shared in the package. How would one then isolate or limit sheets that must be viewed by others? You can’t. I have created an Idea for you to vote for if this is also an issue for you. Please sign in and vote.
Exclude Revit Sheet Sets from Packages
What is the workaround? Either you make peace with the fact that all the Sets are included and use the comparison tool to look for differences in all the documents in the sets, or share PDFs separate to the model. Both workarounds have drawbacks, but also advantages.
Hopefully the ability to limit sets in the shared model will be fixed going into the future. It seems counterproductive to include it in the first place, given that the data shared in packages are supposed to be tightly controlled. It makes no sense that the package can identify that it has certain Sets attached to it, but that the model that is shared ignores this completely. In my humble opinion, Set inclusion should slipsheet per version.
If you need help adopting the AEC Collection or Autodesk Forma in your practice or you are looking to invest in hardware, please contact Micrographics so that we may be of assistance.

